当我们将组件库公开发布后, 可以被任何国家任何人使用, 我们除了要有完善可靠的功能, 还要考虑诸如 国际化 / ts 类型定义 / 主题 等可以提升用户体验的东西
目录
前言
在 使用 Lit 创建一个 AI 对话组件库 03 可行性验证 篇 中我们发现了组件库存在以下问题:
- 缺少 国际化 功能
- 在 vue 中缺少 类型定义
- 缺少 主题 功能
对于一个组件库来说, 我们的组件可能会被不同的项目使用, 如果我们不考虑多语言, 那就极大地限制了不同语言环境下的用户的使用, 所以我们需要考虑国际化; 对于类型定义和主题切换来说也是同样的道理
国际化
shoelace 本身提供了 国际化支持, shoelace 是一个基于 Lit 的优秀的 UI 组件库, 我们阅读一下 shoelace 的源码, 借鉴一下 shoelace 的国际化实现:
我们从语言文件开始, 例如 src/translations/zh-cn.ts, 文件中使用了 src/utilities/localize.ts 中导出的 registerTranslation, registerTranslation 实际上来自于 @shoelace-style/localize 包, 原来 shoelace 将本地化功能拆分为了一个单独的包, 而且可以与 lit 完美结合, 零依赖!
@shoelace-style/localize 的示例:
import { LocalizeController, registerTranslation } from '@shoelace-style/localize';
// Note: translations can also be lazy loaded (see "Registering Translations" below)import en from '../translations/en';import es from '../translations/es';
registerTranslation(en, es);
@customElement('my-element')export class MyElement extends LitElement { private localize = new LocalizeController(this);
@property() lang: string;
render() { return html` <h1>${this.localize.term('hello_world')}</h1> `; }}这里我们引入了 @shoelace-style/localize 并注册了多语言文案 en / es, 接着我们在组件中声明了 localize = new LocalizeController(this) 和 @property() lang: string, 最后在 render 中使用 this.localize.term('hello_world') 来获取文案, 他会在 lang 属性变化的时候自动更新多语言文案内容
这是一个优秀的设计, 我们仅需要修改 html[lang] 或 组件的 lang 属性, 组件就能根据新的语言进行渲染; 我们来猜一下 @shoelace-style/localize 是如何实现的, 首先 new LocalizeController(this) 时将当前组件类的示例传入了 LocalizeController, 并在 LocalizeController 内部监听 lang 属性的变化, 并且调用组件示例的用于渲染 DOM 的方法…
接下来让我们阅读 @shoelace-style/localize 源码, 查看具体是如何实现的:
export class LocalizeController<UserTranslation extends Translation = DefaultTranslation> implements ReactiveController{ constructor(host: ReactiveControllerHost & HTMLElement) { this.host = host; this.host.addController(this); } // ...}首先在 constructor 中调用了组件的 addController, 这是一个用于向 LitElement 添加响应式控制器的方法, 它允许外部代码与 Lit 的响应式生命周期集成, 简而言之 LocalizeController 可以直接调用组件的生命周期 hooks, 也就可以直接更新组件, 详见 Reactive Controllers
const connectedElements = new Set<HTMLElement>();if (isClient) { const documentElementObserver = new MutationObserver(update); documentDirection = document.documentElement.dir || 'ltr'; documentLanguage = document.documentElement.lang || navigator.language;
// Watch for changes on <html lang> documentElementObserver.observe(document.documentElement, { attributes: true, attributeFilter: ['dir', 'lang'] });}/** Updates all localized elements that are currently connected */export function update() { if (isClient) { documentDirection = document.documentElement.dir || 'ltr'; documentLanguage = document.documentElement.lang || navigator.language; }
[...connectedElements.keys()].map((el: LitElement) => { if (typeof el.requestUpdate === 'function') { el.requestUpdate(); } });}// ...
export class LocalizeController<UserTranslation extends Translation = DefaultTranslation> implements ReactiveController{ hostConnected() { connectedElements.add(this.host); }
hostDisconnected() { connectedElements.delete(this.host); } /** * Gets the host element's language as determined by the `lang` attribute. The return value is transformed to * lowercase. */ lang() { return `${this.host.lang || documentLanguage}`.toLowerCase(); } /** Outputs a translated term. */ term<K extends keyof UserTranslation>(key: K, ...args: FunctionParams<UserTranslation[K]>): string { const { primary, secondary } = this.getTranslationData(this.lang()); // ... } // ...}在这里先把组件存到了 connectedElements 中, 然后在外部通过 MutationObserver 监听了 HTML 标签的 lang 属性变化, 并同步调用 update 调用组件的 requestUpdate() 来更新组件; 除此之外, 在组件内部的 lang 属性变化时, 也会调用 render, 并调用 term 来根据最新的 lang 更新组件
至此 @shoelace-style/localize 的示例的具体实现我们就分析完了, 接下来我们看一下 shoelace 是如何使用 @shoelace-style/localize 的:
src/internal/shoelace-element.ts:
export default class ShoelaceElement extends LitElement { // Make localization attributes reactive @property() dir: string; @property() lang: string; // ...}这里 shoelace 并没有在每个组件上都声明 lang / dir, 而是创建了一个基类 ShoelaceElement, 并在所有组件上继承了它, 这样 shoelace 就可以统一处理 lang / dir 了, 不得不说这是一个很优秀的设计
TIP实际上
ShoelaceElement类中还有很多值得学习的地方:
- 类型安全的
emit方法, 通过 函数重载 实现了emit方法的三种不同参数类型, 并实现了很好的类型约束- 组件的动态注册,
define方法实现了 动态注册 和 重复注册检查- 动态依赖加载, 在
constructor中动态注册组件声明的dependencies, 详见 Cherry Pick - Shoelace
国际化实现与组件基类
回到我们的组件库项目中, 我们来基于 @shoelace-style/localize 一步步实现本地化功能, 并且借鉴 ShoelaceElement 的设计:
code src/internal/shoelace-element.tsimport { LitElement } from "lit";import { property } from "lit/decorators.js";
export default class ShoelaceElement extends LitElement { // Make localization attributes reactive @property() dir = 'ltr'; @property() lang = '';}tsconfig.json:
{ "baseUrl": "./", "paths": { "@/*": ["src/*"] },}src/translations/zh-cn.ts:
import { registerTranslation, type Translation } from '@/translations/translation';
const translation: Translation = { $code: 'zh-cn', $name: '简体中文', $dir: 'ltr',
test: '测试',};
registerTranslation(translation);
export default translation;src/translations/en.ts:
import { registerTranslation, type Translation } from '@/translations/translation';
const translation: Translation = { $code: 'en', $name: 'English', $dir: 'ltr',
test: 'test',};
registerTranslation(translation);
export default translation;src/translations/translation.ts:
import type { Translation as DefaultTranslation } from '@shoelace-style/localize';
// Export functions from the localize lib so we have one central place to import them fromexport { registerTranslation } from '@shoelace-style/localize';
export interface Translation extends DefaultTranslation { $code: string; // e.g. en, en-GB $name: string; // e.g. English, Español $dir: 'ltr' | 'rtl';
test: string;}src/utils/localize.ts:
import { LocalizeController as DefaultLocalizationController, registerTranslation } from '@shoelace-style/localize';import type { Translation } from '@/translations/translation';import en from '.@/translations/en'; // Register English as the default/fallback languageimport zhCn from '@/translations/zh-cn'; // Register English as the default/fallback language
/** * Extend the controller and apply our own translation interface for better typings * @see https://github.com/shoelace-style/shoelace/blob/next/src/utilities/localize.ts */export class LocalizeController extends DefaultLocalizationController<Translation> { // Technicallly '../translations/en.js' is supposed to work via side-effects. However, by some mystery sometimes the // translations don't get bundled as expected resulting in `no translation found` errors. // This is basically some extra assurance that our translations get registered prior to our localizer connecting in a component // and we don't rely on implicit import ordering. static { registerTranslation(en); registerTranslation(zhCn); }}src/components/hyosan-chat.ts:
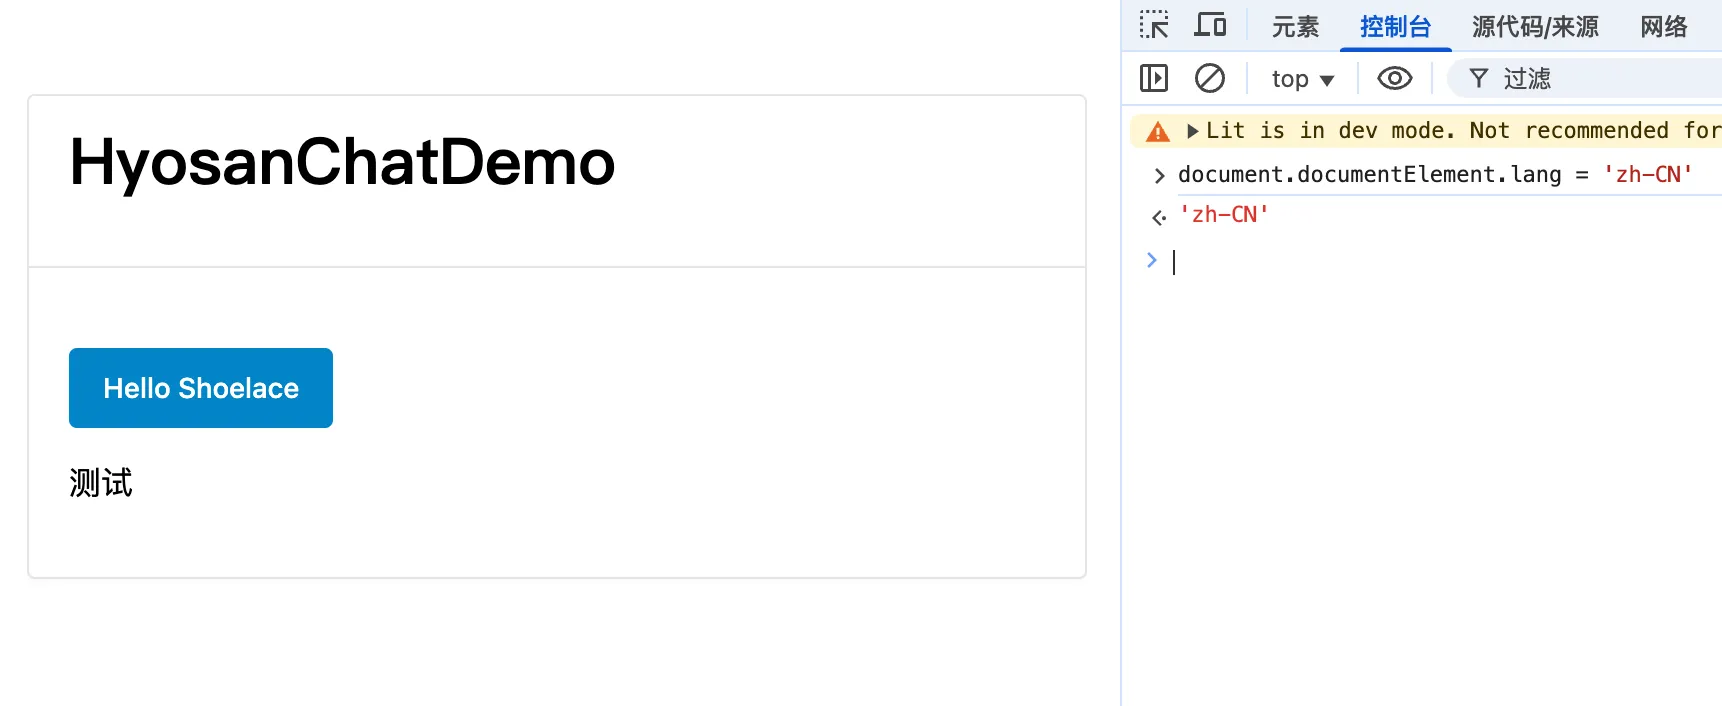
import ShoelaceElement from '@/internal/shoelace-element' import { LocalizeController } from '@/utils/localize' export class HyosanChat extends LitElement { export class HyosanChat extends ShoelaceElement { private _locailze = new LocalizeController(this) render() { return html` <h2>${this.message}</h2> <sl-button variant="primary">Hello Shoelace</sl-button> <p>${this._locailze.term('test')}</p> ` }}这里我们创建了一些本地化相关的类和函数, 并在组件中通过 LocalizeController 来实现本地化功能, 我们来测试一下
- 修改组件的
lang属性:
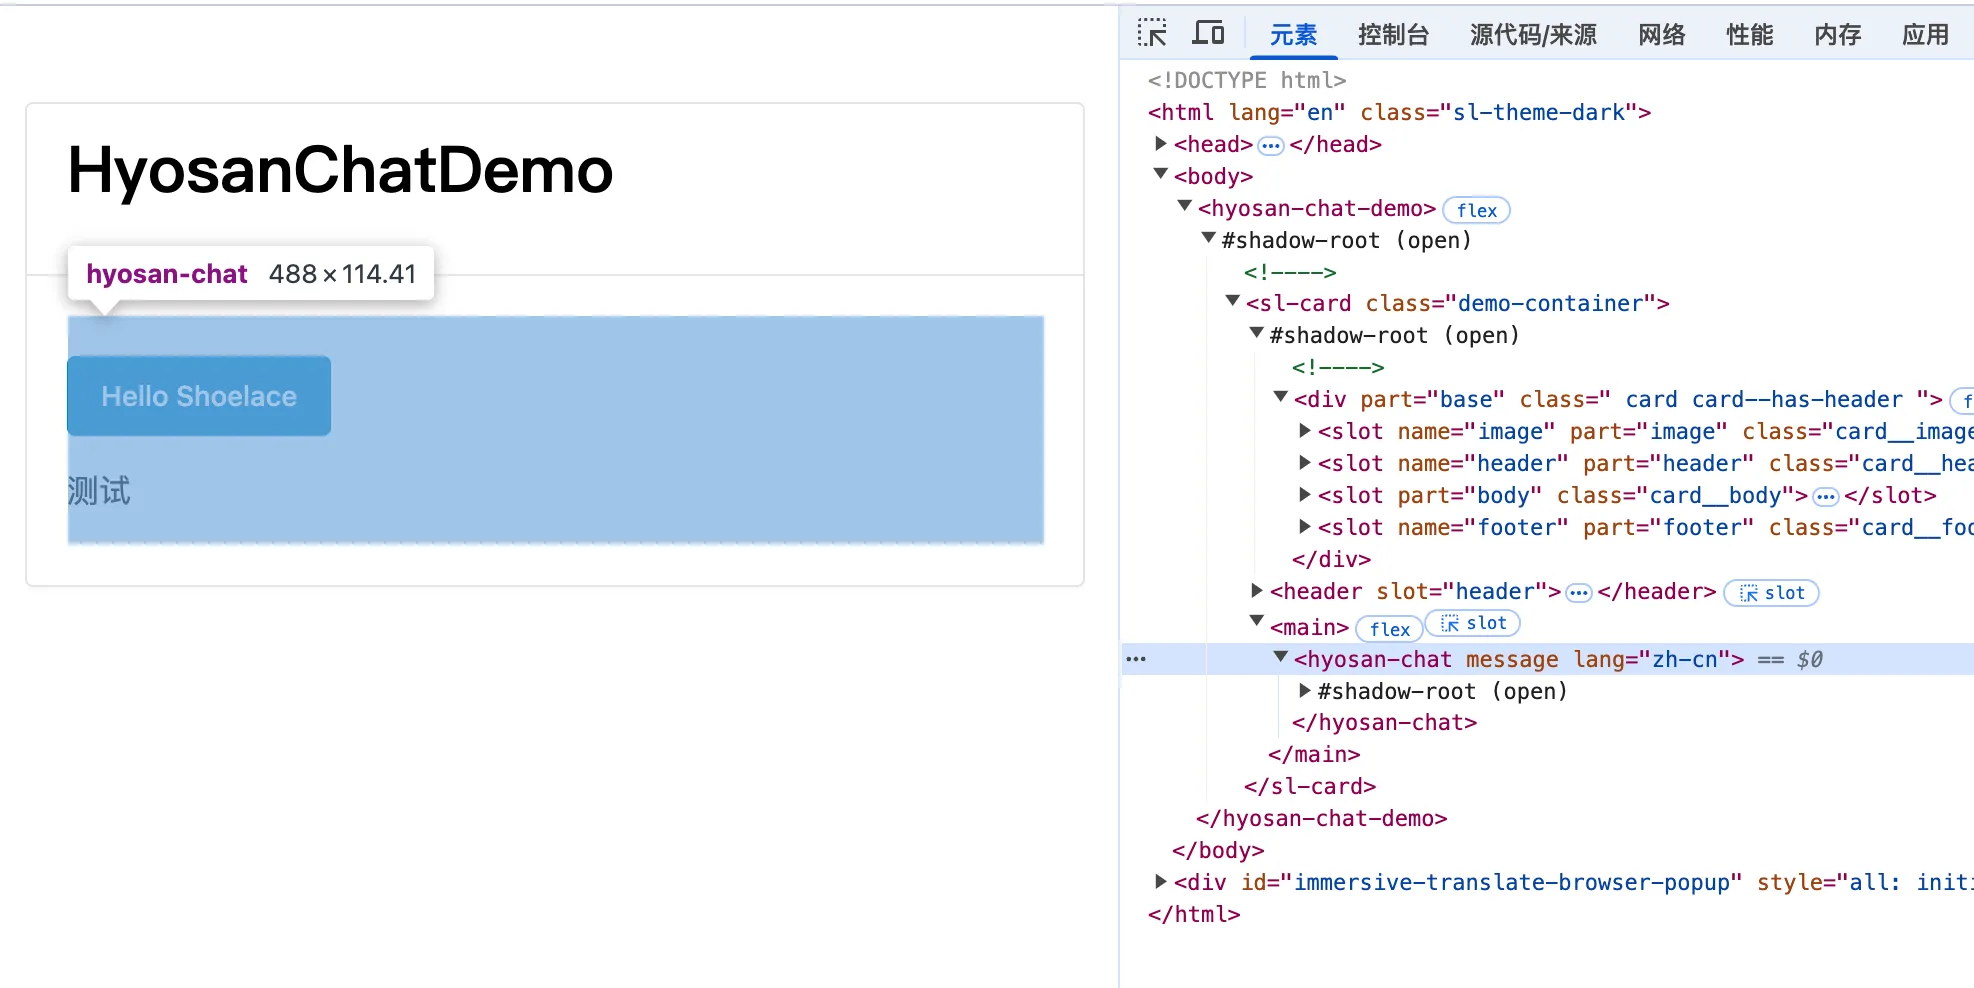
- 修改
<html>的lang属性: